How to sign with your Ledger (Bluetooth)
Oasis Vault uses a 2-of-3 multisig setup: your mobile key, your Ledger, and Oasis’s recovery key. For vault transactions, you sign with both your mobile key and your Ledger over Bluetooth. Your Ledger connects wirelessly to your phone - no computer or cable required.
What you’ll need
- ✅ Oasis Vault mobile app installed
- ✅ An active plan
- ✅ A Ledger connected to your Oasis Vault
- ✅ Bluetooth enabled on your phone, with your Ledger nearby and turned on
Step-by-step instructions
Step 1 – Make sure no other app is using your Ledger
Your Ledger connects to one app at a time over Bluetooth. Before you use it in Oasis Vault, close any other app that’s connected to it (like Ledger Live on another phone), or the connection may be blocked.
Step 2 – Start a transaction
Whether you’re sending, swapping, depositing, or withdrawing, the app prompts you to sign with both your mobile key and your hardware wallet when you reach the confirmation step.
Step 3 – Sign with your mobile key
Follow the passkey prompt on your phone.
Step 4 – Pair your Ledger (first time only)
The first time you use your Ledger with Oasis Vault, the app shows a screen with your Ledger’s name. Tap it to start pairing.
The Ledger asks you to confirm the pairing - a 6-digit code appears on the Ledger screen, and the app shows it too so you can verify it’s the right device before you confirm.
Pairing happens once. After that, your Ledger connects automatically when needed.
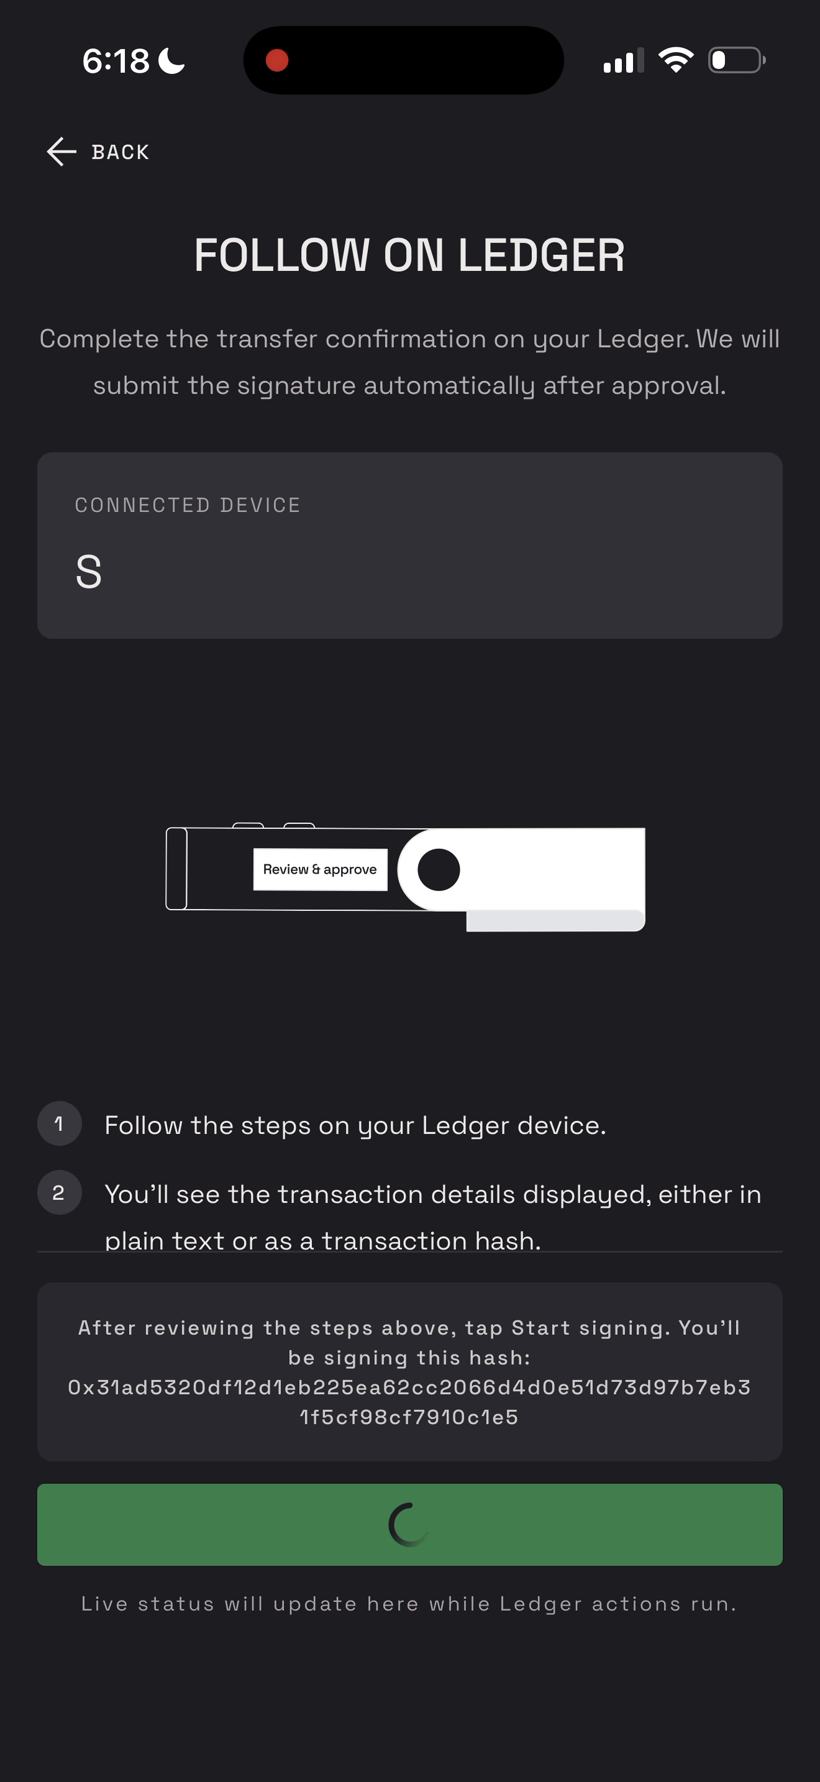
Step 5 – Review and approve on your Ledger
Check the transaction details on the device screen, then press Review & approve. The Ledger shows the details in plain text or as a transaction hash.
Step 6 – Wait for confirmation
The app submits the signature automatically after you approve on the Ledger. Live status updates on the Follow on Ledger screen while it runs.